Ten puzzles follow below. They start off easy, but ramp up in difficulty as you move forward.
Test your wits and see how far you can get! I will post the answers at the end of March.
1

White to move and mate in 1.
2

White to move and win.
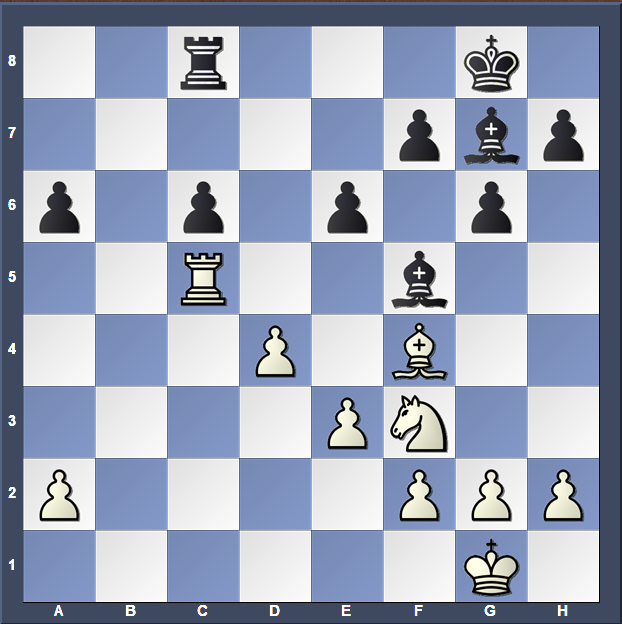
3

Black to move and win.
4

With best play, does black win or is this position a draw? Assume black to move.
5

What is the fewest number of moves it takes for white to force mate?
6

Suppose from the starting position, white can make eight pawn moves in a row, but they all have to be with the SAME pawn. You must still keep moving the "pawn" even after you've promoted it. Given these constraints, find the only way for white to deliver mate on the eighth move without playing a single check until the final checkmate.
7

Find the best continuation for black.
8

Black to move and win.
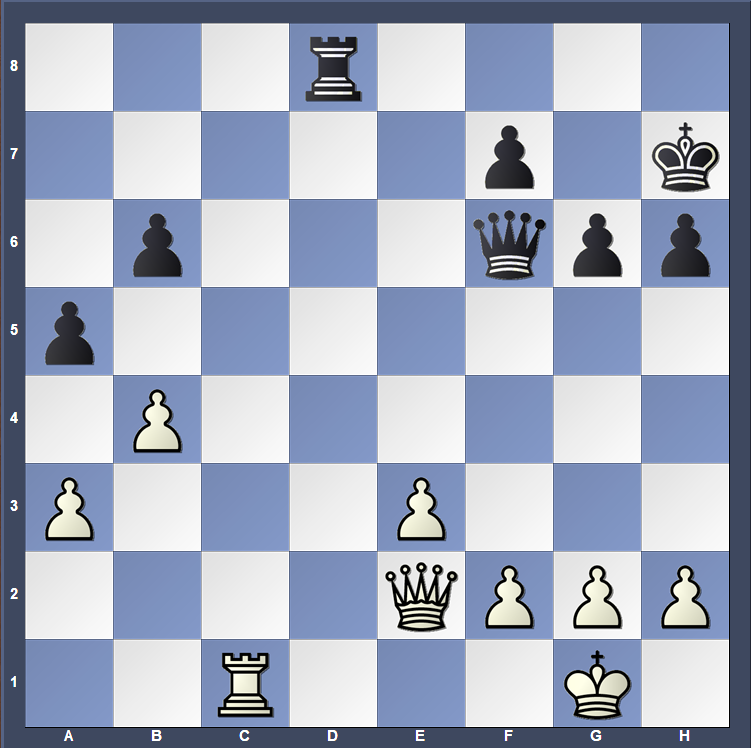
9

White to move and win.
10

White to move and mate in three.